
Table of Contents
- Bathroom Renovation Steps: The Full Sequence at a Glance
- How Long Does a Bathroom Renovation Take? Phase-by-Phase Ranges
- Bathroom Renovation Planning Checklist: Before Demo Day
- Bathroom Remodel Week by Week: A Realistic Schedule
- Trade Dependencies and Sequencing: What Must Happen First
- Permits, Inspections, and Code Requirements
- What Delays a Master Bathroom Renovation (and How to Buffer for It)
- Keeping Your Bathroom Usable During the Renovation
- Frequently Asked Questions
Last Updated: October 18, 2026
Bathroom Renovation Steps: The Full Sequence at a Glance
A master bathroom renovation follows a fixed order: plan and budget, design and select materials, prepare the space, demolish, rough in plumbing and electrical, close up walls, waterproof and tile, install fixtures and the vanity, then finish and inspect. Skip a step and the ones after it stall. This step by step master bathroom renovation timeline walks you through that order with realistic ranges and the trade sequencing that keeps a project moving. At Pro Kitchen & Bath, we have managed these sequences for more than 25 years, and the biggest delays come from planning gaps, not slow tradespeople.
Here is the whole job on one page:
| Phase | Typical Duration | Depends On |
|---|---|---|
| Planning and budgeting | 2-4 weeks | Scope decisions |
| Design and material selection | 3-6 weeks | Layout and lead times |
| Prep and demolition | 2-4 days | Permits in hand |
| Plumbing and electrical rough-in | 4-7 days | Demo complete, inspection booked |
| Wall and ceiling closing | 2-3 days | Rough-in inspection passed |
| Waterproofing and tiling | 7-12 days | Walls closed, tile on site |
| Vanity and fixture install | 3-5 days | Tiling cured |
| Finishing and walkthrough | 2-4 days | All trades done |
The total bathroom renovation timeline for a full master bath usually lands between six and twelve weeks. Smaller refreshes run shorter. Structural changes or a moved drain push it longer.
How Long Does a Bathroom Renovation Take? Phase-by-Phase Ranges
A full master bathroom renovation takes six to twelve weeks from first consultation to final walkthrough. A cosmetic refresh, where the layout stays put and you replace finishes only, can wrap in three to four weeks.
The range is wide because the work is a chain of jobs, each with its own clock: planning and design (two to six weeks, mostly your decision time), material lead time (two to eight weeks), rough-in trades (one to two weeks), tiling and waterproofing (one to two weeks plus cure time), and finishing (three to five days). What most guides miss is the overlap: design and ordering can run while you finalize the budget, but demolition cannot start before permits are approved, and tiling cannot start before rough-in inspections pass. Those hard stops, not labor hours, set the real duration.
Order long-lead items the day your design is signed off. A vanity or specialty tile that arrives late can idle a whole crew, and that idle week costs more than the tile did.
Bathroom Renovation Planning Checklist: Before Demo Day
A bathroom renovation planning checklist is the single best defense against overruns. Complete every item before anyone swings a hammer.
- Set a total budget with a contingency buffer for surprises behind the walls
- Decide the scope: refresh only, or layout change with moved plumbing
- Confirm who manages trades and the schedule
- Book a site evaluation and consultation
- Finalize the layout and design
- Select and order tile, vanity, fixtures, and lighting
- Confirm delivery dates for every long-lead item
- Apply for permits and confirm inspection requirements
- Plan a temporary bathroom for the household
- Agree on a written scope of work and payment schedule
The contingency line matters. Older homes hide surprises: a soft subfloor, outdated wiring, or a drain that does not match the new layout. A buffer absorbs those without renegotiating the whole job.
Bathroom Remodel Week by Week: A Realistic Schedule
A bathroom remodel week by week is easier to trust when you see the working days inside each week and the handoffs between trades.
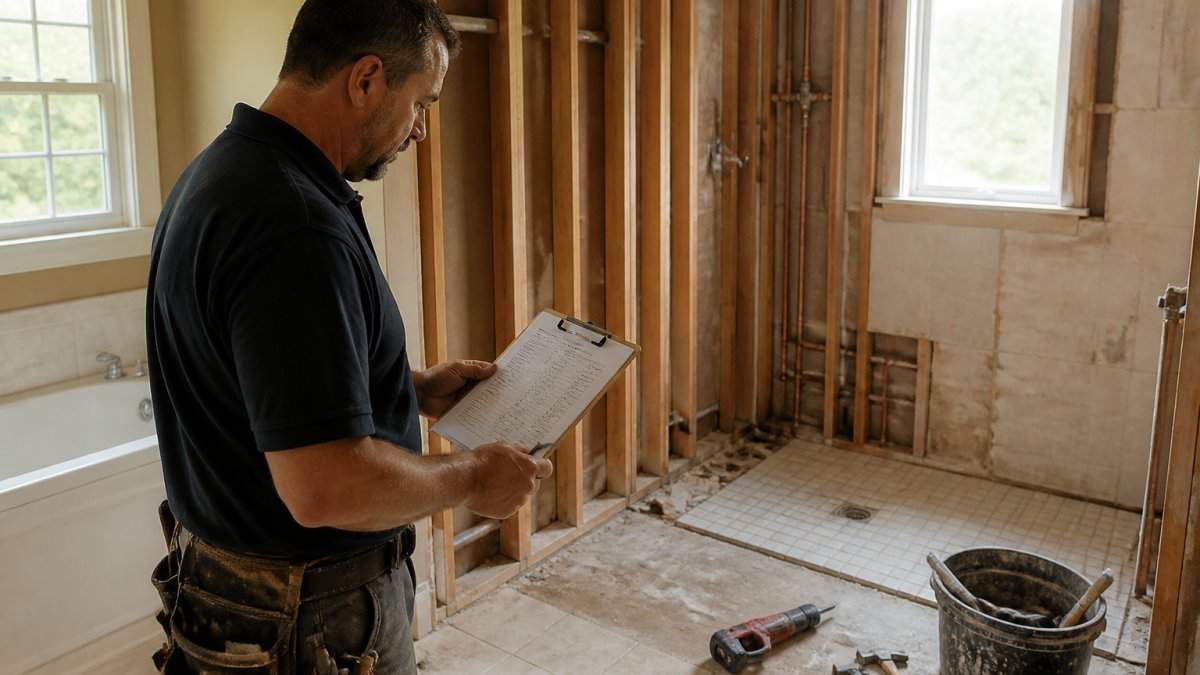
Week 1, Design lock and procurement (5 working days). Finalize the layout, sign off on the design, and place orders for tile, vanity, fixtures, lighting, and the shower system. Submit the permit application the same week.
Week 2, Permit wait and site preparation (3-5 working days of active work). While the permit is under review, protect the route to the bathroom, set up dust barriers, and stage materials.
Week 3, Demolition and rough-in start (5-7 working days). Demo typically takes 2-4 days for a master bath: remove fixtures, vanity, tile, and drywall to the studs. Then the plumber and electrician begin rough-in.
Week 4, Rough-in inspection and wall closing (3-5 working days). The rough-in inspection is a gate. If it passes, insulation, drywall, and ceiling go back up in 2-3 days.
Week 5, Waterproofing and cure (3-5 working days). Apply waterproofing membrane to the shower walls, floor, and wet zones. Follow the manufacturer’s cure time before tile, commonly 24 hours, sometimes longer in humid conditions.
Weeks 6-7, Tiling, grouting, and sealing (7-10 working days). Wall tile, floor tile, niche details, and any mosaic work. Large-format tile and complex patterns add days.
Week 8, Vanity, fixtures, and trim (3-5 working days). Set the vanity, connect the sink and faucet, install the toilet, shower trim, lighting, mirror, and accessories.
Week 9, Finishing and walkthrough (2-4 working days). Touch-up paint, caulk, clean-up, and a punch list. The final inspection follows once the work is complete.
A day-by-day view matters because it shows where a slip hurts most. A two-day delay in week 1 is often recoverable; a two-day delay at the rough-in inspection in week 4 pushes every trade behind it.
Ask your contractor for the schedule in working days, not calendar weeks. A “week” that includes a holiday, a cure period, and an inspection wait is not the same as five productive days.
Trade Dependencies and Sequencing: What Must Happen First
Trade sequencing is the rulebook that keeps a renovation from stalling. Each trade depends on the one before it, and the wrong order causes rework. The chain runs like this:
- Demolition clears the space.
- Plumbing rough-in moves or replaces supply and drain lines.
- Electrical rough-in runs wiring for lights, fan, and outlets.
- Inspection signs off on the rough-in before walls close.
- Wall and ceiling closing seals everything in.
- Waterproofing protects the wet zones.
- Tiling covers walls and floor.
- Vanity and fixtures go in last.
The inspection is a gate, not a formality. If rough-in work fails, walls stay open and every trade behind it waits. Book inspections early and build a buffer around them.
Closing walls before the rough-in inspection passes is the costliest sequencing mistake in a bathroom. If the inspector flags an issue, the drywall comes back down, and you pay twice for the same wall.
Permits, Inspections, and Code Requirements
Permits and inspections are a normal part of a master bathroom renovation, not a red flag. Most municipalities require a permit when you move plumbing, add or relocate electrical, or change the layout. Cosmetic swaps, like replacing a vanity in the same spot, often do not.
Plan for these checkpoints:
- Building permit: required for structural or layout changes
- Plumbing permit and inspection: required when lines move
- Electrical permit and inspection: required for new wiring or circuits
- Final inspection: confirms the finished work meets code
Requirements vary by municipality, so confirm the specifics with your local building department before work starts. Missed inspections are one of the most common causes of stalled schedules. At Pro Kitchen & Bath, we coordinate permits and inspections as part of full project management, from layout planning through trade coordination.
What Delays a Master Bathroom Renovation (and How to Buffer for It)
Delays in a master bathroom renovation cluster around a predictable set of causes. The useful question is not whether they will happen but where in the schedule they land and how much slack you have built around that point.
Late or backordered materials. Tile, specialty vanities, and shower systems are the usual culprits. The fix is procurement discipline: order long-lead items the day the design is signed off, confirm delivery dates in writing, and ask for a tracking number, not a promise.
Failed or delayed inspections. Rough-in inspections are a gate. If plumbing or electrical work fails, walls stay open and every trade behind the inspection waits.
Hidden damage behind the walls. Older homes hide soft subfloor, outdated wiring, or a drain that does not match the new layout. This is where the contingency line earns its keep.
Decision lag. Selections made during construction instead of before it are the quietest delay. Every fixture, tile, and trim choice still open when demo starts becomes a pause for the crew. Lock in selections before demo day, and keep a single decision-maker so approvals do not bounce between household members.
Permit delays. Permit review times vary by municipality and scope. A layout change with moved plumbing usually takes longer to review than a like-for-like replacement. Submit early, ask the building department for the expected review window, and do not schedule demolition until the permit is in hand.
How to buffer without inflating the schedule. Build slack where the hard stops are, not at the end. Two buffer days around the rough-in inspection, a cure window after waterproofing, and a confirmed delivery date for every long-lead item do more than a vague “extra week” tacked onto the finish.
A contingency budget is not a slush fund for upgrades. If you spend it on a nicer vanity before demo, it will not be there when the subfloor needs replacing.
The most reliable way to protect a bathroom renovation timeline is to front-load decisions and materials, then place buffer days around inspections and cure periods. Most delays are planning gaps that surface as construction problems.
Keeping Your Bathroom Usable During the Renovation
Keeping a bathroom usable during a master bath renovation takes planning, especially in a one-bathroom home. Your options:
- Use a second bathroom if the home has one, and stage it as the household’s main bath
- Set up a temporary solution with a portable toilet and a gym or community shower
- Phase the work so the toilet stays connected as long as possible
- Protect the space with dust barriers and floor coverings to limit mess elsewhere
A common mistake is assuming the bathroom will be out of action for the whole job. In practice, the toilet is often the last thing removed and the first thing reinstalled. Ask your contractor to sequence demo and install to shorten the window when the room is fully unusable.
A master bathroom renovation rewards planning over speed. The homeowners who sail through lock in design, materials, and permits before demo day, then let a coordinated crew work the sequence. If you want that kind of managed process, Pro Kitchen & Bath brings more than 25 years of hands-on experience to every project, with full project management from layout planning to trade coordination and a focus on honest, non-cookie-cutter design. Book FREE Consultation and get a realistic plan for your space.
Frequently Asked Questions
How long should it take to remodel a master bathroom?
Most master bathroom renovations take 4 to 8 weeks of active construction, with the full bathroom renovation timeline running 6 to 10 weeks once you count design, ordering, and inspections. A cosmetic refresh with no layout changes can finish in 3 to 4 weeks. A custom bathroom with relocated plumbing, new electrical, and full waterproofing often runs 8 to 12 weeks. The biggest variable is not labor speed but lead times on tile, vanities, and fixtures, so order early.
What can delay a master bathroom renovation?
The most common delays are backordered tile and fixtures, hidden water damage found after demolition, permit and inspection scheduling, and trades arriving out of sequence. A failed rough-in inspection can add several days because the next trade cannot start until it passes. Build a 10 to 15 percent buffer into your schedule and order long-lead items before demolition begins. Keeping a written milestone list with your contractor makes slippage visible early rather than at the end.
Can I use my bathroom during the renovation?
For most of the project, no. Once demolition starts and the toilet and shower are disconnected, the room is unusable. Plan a second bathroom or a temporary setup for the full construction window. Some homeowners keep a working toilet in place as long as possible by sequencing the new floor and fixtures carefully, but this only works on small cosmetic jobs. Discuss the staging plan with your contractor before work begins so you know exactly which days the room is off limits.
When should I order bathroom fixtures and materials?
Order long-lead items as soon as the design is finalized and before demolition starts. Tile, custom vanities, and specialty glass can take several weeks to arrive. Fixtures such as the toilet, faucets, and shower valve should be on site before the rough-in stage so the plumber can install to the correct dimensions. Storing materials early avoids the most common cause of a stalled bathroom renovation timeline: a crew ready to work with nothing to install.