
Last Updated: October 30, 2026
Quick Summary
Trade coordination is the practice of scheduling and sequencing every contractor, supplier, and inspection on a renovation so each one arrives when the site is ready for them. Build a written master schedule with dependencies, lead times, locked inspection dates, and two to three float days between each major phase. Keep one point of contact and a single handoff log so delays surface early.
- Sequence trades from demolition through rough-in, inspection, finishing, and final inspection, keeping dependency logic intact.
- Never let a finishing trade start before rough-in inspection passes, and never template countertops before cabinets are set and level.
- Confirm each trade’s start date and scope in writing one week out and again 48 hours before.
- Set aside 10-15% of the contract value for surprises like hidden water damage or knob-and-tube wiring.
- When a delay trigger fires, the lead contractor should present a written recovery plan within 24 hours.
Table of Contents
- Why Trade Coordination Decides Whether Your Renovation Succeeds
- Building a Renovation Project Schedule Template That Works
- The Correct Order of Trades in a Home Renovation
- Your Trade Coordination Checklist for Renovations
- How Long Does a Home Renovation Take?
- Communication Protocols, Permits, and Contingency Planning
- Book a Free Consultation With a Team That Manages Every Trade
- Frequently Asked Questions
Why Trade Coordination Decides Whether Your Renovation Succeeds
Trade coordination is the practice of scheduling and sequencing every contractor, supplier, and inspection on a renovation so that each one arrives when the site is ready for them.
Most delays are not caused by slow workers, they are caused by trades arriving in the wrong order.
The fix is a written plan with named dates, a single point of contact, and rules for when something slips. Here is how to build that plan, in order.
Building a Renovation Project Schedule Template That Works
A renovation project schedule template is a dated list of every task, who owns it, and what must finish before it can start. It only works if it shows dependencies, not just dates.
What Every Master Schedule Should Include
Your master schedule needs six things before work begins:
- Task list broken down by trade, not by room
- Durations for each task in working days
- Dependencies showing which tasks block others
The buffer point matters most. A schedule with all slack saved for the final week will fail. Put two or three days of float between each major phase so one late delivery does not cascade through the job.
The Correct Order of Trades in a Home Renovation
The correct order of trades in a home renovation runs from demolition through rough-in, inspection, finishing, and final inspection. Each trade depends on the one before it, so getting the sequence wrong means paying someone to return.
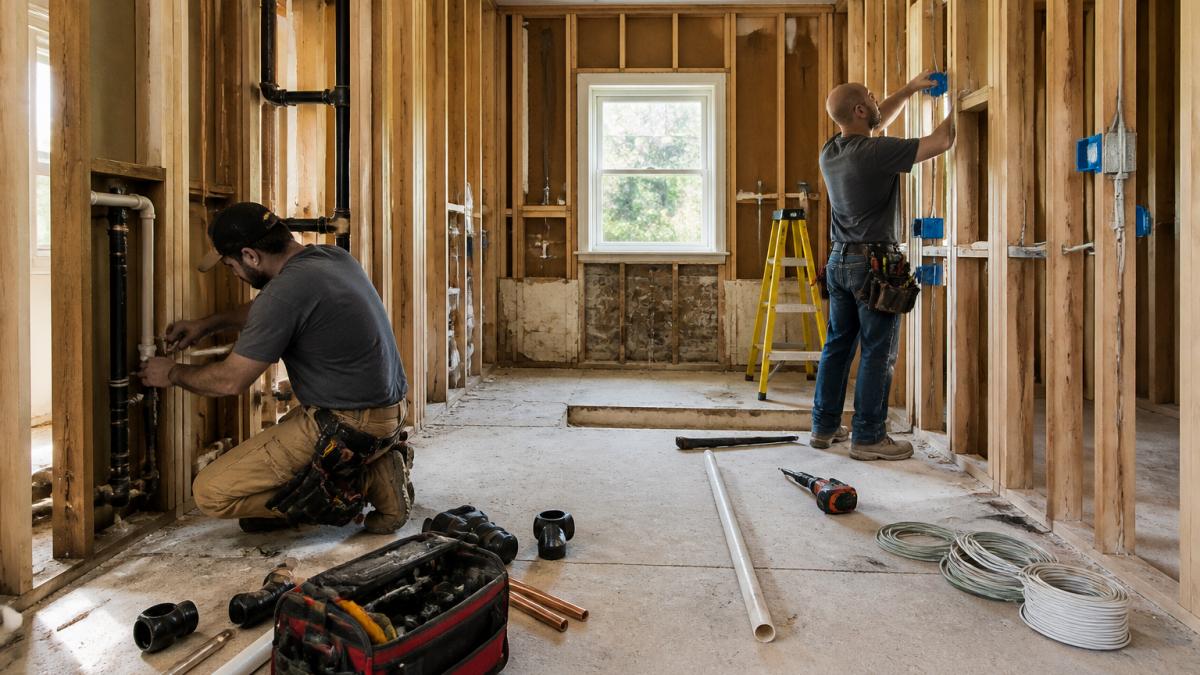
A Trade-by-Trade Sequencing Template
Use this sequence as your starting point. Adjust for your scope, but keep the dependency logic intact.
| Step | Trade or Task | Depends On | Typical Duration |
|---|---|---|---|
| 1 | Demolition and disposal | Site protection complete | 1-3 days |
| 2 | Structural work and framing | Demolition done | 2-5 days |
| 3 | Plumbing rough-in | Framing inspected | 2-4 days |
| 4 | Electrical rough-in | Framing inspected | 2-4 days |
| 5 | HVAC rough-in | Framing inspected | 1-3 days |
| 6 | Rough-in inspection | All rough-ins complete | 1 day |
| 7 | Insulation and drywall | Inspection passed | 3-5 days |
| 8 | Taping, mudding, sanding | Drywall hung | 3-4 days |
| 9 | Painting and priming | Sanding complete | 2-4 days |
| 10 | Cabinet and fixture install | Painting cured | 3-5 days |
| 11 | Countertop template and install | Cabinets set | 5-10 days |
| 12 | Tile, flooring, trim | Cabinets and counters in | 4-7 days |
| 13 | Plumbing and electrical finish | Surfaces complete | 2-3 days |
| 14 | Final inspection and punch list | All trades finished | 1-2 days |
Two rules keep this table honest: never let a finishing trade start before rough-in inspection passes, and never book a countertop template before cabinets are fully set and level.
Your Trade Coordination Checklist for Renovations
A trade coordination checklist for renovations is more than a pre-visit reminder, it is a quality-control and handoff system that prevents small failures from becoming big delays. This one covers the full handoff cycle: before, during, and after each trade’s visit, plus inspection checkpoints that protect you from rework.
Before the Trade Arrives
- Confirm start date and scope in writing at least one week out, and again 48 hours before.
- Verify the previous trade has finished and the area is clean, clear, and safe.
- Confirm materials for that trade are on site or arriving that morning, check quantities against the drawings.
During the Trade’s Visit
- Walk the work area with the trade lead at start of day to confirm scope and any site-specific constraints.
- Check that protection (floor coverings, dust barriers, outlet covers) is in place before work begins.
- Confirm the trade is not covering up another trade’s uninspected work.
- Note any site condition that could affect the next trade (e.g., uneven subfloor, missing blocking, undersized wiring).
After the Trade Leaves
- Inspect the work against the scope and drawings. Record deficiencies in a shared log with photos.
- Confirm the trade has cleaned the area and removed debris.
- Get written sign-off (email is fine) that the trade has completed their scope and any deficiencies will be corrected by a stated date.
- Update the master schedule: mark the task complete, confirm the next trade’s start date, and check whether any buffer days were consumed.
Trade-Specific Checkpoints That Prevent Rework
Generic checklists miss the trade-specific handoffs where most rework happens. Add these to your project log:
- Demolition → framing: Confirm no load-bearing elements were removed without engineering approval; photograph exposed structure.
- Framing → rough-ins: Confirm blocking is installed for cabinets, grab bars, and fixtures before rough-ins close up the walls.
- Rough-ins → inspection: Confirm nail plates protect wiring, plumbing is pressure-tested, and HVAC ducting is sealed and sized correctly.
- Drywall → finishing: Confirm all rough-ins passed inspection and photos are on file before board goes up.
Keep a single “handoff log” in your shared folder. Each row records the trade, date, sign-off status, deficiencies, and next trade notified. This one document replaces scattered texts and emails and becomes your evidence if a dispute arises.
How Long Does a Home Renovation Take?
Total elapsed time for a renovation depends on the project, and is usually longer than the on-site work because material lead times and inspections add waiting days.
The honest answer depends on four things:
- Scope: cosmetic refresh versus full gut and rebuild
- Lead times: cabinets and specialty tile can take weeks to arrive
- Inspection scheduling: local timelines vary and are outside your control
- Change orders: every mid-project change resets part of the sequence
A common mistake is judging the timeline from on-site work alone. Cabinets ordered on day one may not arrive until week five.
Expect the site to be unusable for much of the renovation. Set that expectation before demolition day.
Communication Protocols, Permits, and Contingency Planning
Communication protocols, permits, and contingency planning are the three systems that hold a schedule together when something goes wrong. Without them, a single late delivery becomes a two-week shutdown.
Communication Protocols That Prevent Misunderstandings
A single point of contact is the foundation, but it only works if information flows through defined channels. Set these protocols before demolition:
- Weekly site meeting: Same day, same time, 15 minutes max. Walk the site with the lead contractor, confirm the week’s trades, and flag any blockers. Keep a written log of decisions and who owns each action.
- Daily check-in (text or email): A short end-of-day message from each trade confirming what was completed, what’s outstanding, and whether the next trade can start. This catches small slips before they cascade.
- One shared folder: Store current drawings, permits, change orders, inspection reports, and meeting notes in a single cloud folder. Version-control drawings with dates in the filename (e.g.,
kitchen-plan-2026-10-30.pdf) so no trade works from an old revision. - Change order protocol: Any scope change, even a verbal one, gets a one-page written change order with cost, schedule impact, and both parties’ signatures before work proceeds. Verbal approvals are the leading cause of disputes.
A common pattern among experienced renovators is the “48-hour rule”: any decision that affects another trade must be communicated at least 48 hours before that trade’s start date. This gives the affected trade time to adjust without charging a return visit.
Permits, Inspections, and Code Dependencies
Permits are not paperwork you handle at the end. They are schedule dependencies that can stop work cold.
In most Canadian jurisdictions, work that alters plumbing, electrical, or structural elements requires a permit and inspection before it can be covered up. Confirm requirements with your local authority before demolition. Some municipalities also require separate permits for HVAC alterations or secondary suites.
Build these checkpoints into your master schedule:
- Permit application: Submit before demolition starts. Processing times vary by municipality, budget one to three weeks in urban areas, longer in rural or high-volume periods.
- Rough-in inspection: Book as soon as plumbing, electrical, and HVAC rough-ins are complete. Do not let drywall cover uninspected work, the cost to reopen a wall is far higher than the inspection fee.
- Mid-project inspections: Some jurisdictions require separate inspections for framing, insulation, or fire separation. Confirm the full list at permit application.
- Final inspection: Book once finishing trades are done and punch-list items are resolved. Keep signed reports in your shared folder.
A failed inspection is not just a delay, it can trigger rework by multiple trades. Schedule a pre-inspection walkthrough with your lead contractor the day before each inspection to catch obvious issues (missing nail plates, improper venting, unsecured wiring).
Contingency Planning With Measurable Buffers
“Expect delays” is not a plan. A workable contingency plan has three components: buffers, triggers, and recovery steps.
Buffers: Hold two to three float days between each major phase (not at the end of the project). For budget, set aside 10-15% of the contract value for surprises, older homes routinely uncover hidden water damage, knob-and-tube wiring, or undersized framing that adds cost and time.
Delay triggers: Define in advance what counts as a schedule slip that requires action. Examples:
- A trade is more than two days late without notice.
- A material delivery misses its confirmed date by more than three days.
- An inspection fails and requires rework.
- A change order adds more than three days to the critical path.
Recovery steps: When a trigger fires, the lead contractor should present a written recovery plan within 24 hours.
The goal of contingency planning is not to avoid all delays, it is to make delays visible early and decide the response before the schedule collapses. A written trigger-and-recovery protocol turns a crisis into a manageable decision.
Book a Free Consultation With a Team That Manages Every Trade
Coordinating trades is a full-time job layered on top of your own. Someone has to chase deliveries, confirm inspection dates, and decide what happens when the electrician is running two days late.
That is the work we take on. Pro Kitchen & Bath manages every phase of a kitchen or bathroom project, from layout planning through trade coordination, so you deal with one point of contact instead of several.
Book a free consultation with our team to talk through your project.
Frequently Asked Questions
What does trade coordination mean in a home renovation?
Trade coordination means scheduling and supervising every trade, from demolition crews to plumbers, electricians, and cabinet installers, so each one arrives in the right order without overlapping or stalling the project. It covers the master schedule, site access, material deliveries, and communication between contractors. One point person tracks progress and resolves conflicts before they cost time or money.
In what order should trades work on a renovation?
The usual order of trades in a home renovation runs demolition, structural work, rough-in plumbing and electrical, inspections, insulation and drywall, then tile, cabinetry, countertops, and finish trades like painting and hardware. Each trade depends on the one before it, so a plumbing rough-in must pass inspection before drywall closes the walls. Deviating from this sequence causes rework and delays.
How can you handle a trade contractor who falls behind schedule?
Act early. Check progress against your schedule template every few days, document the shortfall in writing, and ask the contractor for a recovery plan with dates. If the delay affects the next trade, adjust the master schedule and notify everyone involved. A contingency buffer of several days between phases absorbs minor slips. Persistent problems may require escalation under the terms of your contract.
How long does a home renovation take?
Timelines vary with scope. Timelines depend on the project, and permits and material lead times can extend them. A realistic schedule built around trade availability and delivery dates, with buffer time, gives a more reliable answer than a generic estimate.
